

Alliance Training
A one-hour, thirty-versus-thirty battlefield where structures — not kills — produce the score. Whoever holds the most Training Points at 60:00 wins.
Battle Length
60 min
Team Size
30 + 10
Entry
CO Lv.16+
Wounded
Free Heal
Quick Summary
How It Works
Structures score. Kills do not.
- Two alliances field up to 30 combatants each on a shared battlefield for 60 minutes.
- Structures across the map generate Alliance Training Points while you hold them.
- Capturing a structure for the first time pays a one-off initial control bonus, then a smaller ongoing amount for as long as you keep it.
- Wounded officers are healed for free, so trading troops for map control is far cheaper than usual.
- The alliance with the most Training Points when the clock hits 60:00 wins.
Event Cycle
- 1
Vote · 2 Days
Members vote for the battle time they can actually show up for.
- 2
Sign Up · 2 Days
Leadership builds Team 1 and Team 2 from the registered roster.
- 3
Match · 2 Days
Matchmaking picks the opposing alliance.
- 4
Fight · 60 Minutes
The battlefield opens. Everything above was preparation for this hour.
The one line that decides most matches
Eligibility
Who Can Join
Alliance Requirements
- Top 20 alliance by Alliance Power
- Team 1 is available by default
- Team 2 requires Alliance Level 6+
- Team 2 also requires 40 alliance members to have logged in during the current week
- Minimum 15 registered members per team
- Up to 30 combatants plus 10 substitutes
Player Requirements
- Chief's Office Lv.16+
- Must join the alliance before signup closes
- Players offline 5+ days at signup cannot be assigned
The Map
The Battlefield
Tap a marker to open that structure's points, unlock time and role.
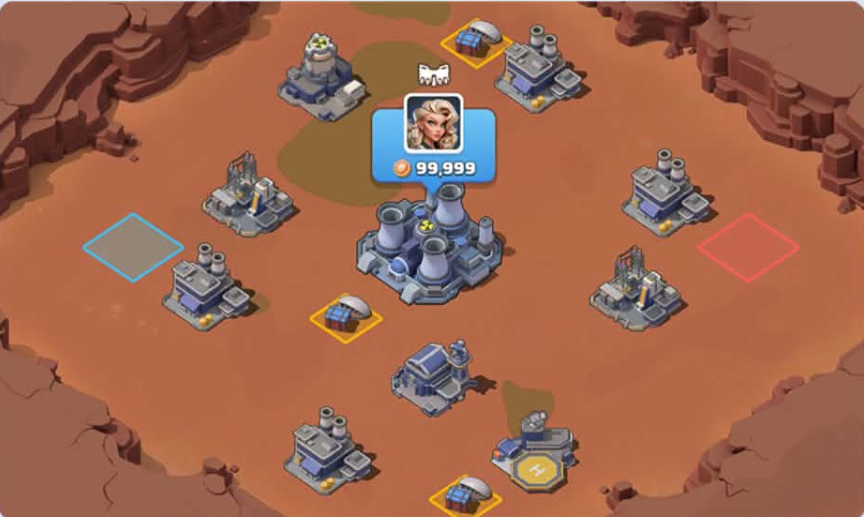
Deployment zones
Objectives
Battlefield Structures
Every structure pays an initial control bonus, then a smaller amount for as long as you hold it.
Points
Scoring & Rewards
Alliance points win the match. Personal points pay you.
How Points Are Produced
- First capture pays a one-off initial control bonus to both the alliance and the capturing Chief.
- While held, the structure keeps producing a smaller ongoing amount.
- Each structure has a production cap. Once reached, half of the further points go to the alliance and half become Defensive Training Points.
- Defensive Training Points are lost if the structure is captured by the enemy — so a long-held building is worth defending hard.
- When a capped structure changes hands, Scattered Supplies drop onto the battlefield for anyone to collect.
Personal Reward Tiers
- Tier 12,000 – 19,999 pts
- Tier 220,000 – 41,999 pts
- Tier 342,000 – 89,999 pts
- Tier 490,000 – 179,999 pts
- Tier 5180,000+ pts
Reward contents vary by season — the point thresholds are the reliable part.
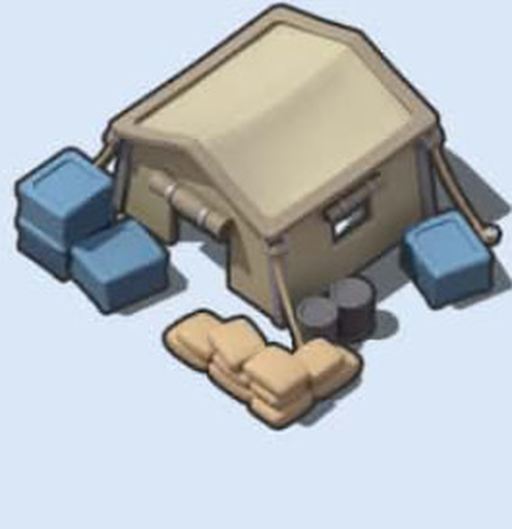
Free Score On The Ground
Resupply waves and Scattered Supplies are uncontested points if — and only if — somebody is assigned to pick them up.
Payouts
Reward Tables
Alliance rewards depend on the result. Solo rewards depend on your Personal Training Points.
Alliance Rewards — If your Team wins
2,000
Training Ticket

×6
Gems ×100
×2
Alliance Territory Item
×4
Police Badge
×80
Ammo ×10K

×80
Cash ×10K
×16
Power ×10K
Alliance Rewards — If your Team loses
1,500
Training Ticket
×3
Gems ×100
×1
Alliance Territory Item
×2
Police Badge
×40
Ammo ×10K
×40
Cash ×10K
×8
Power ×10K
2,000 – 19,999personal points
2,400
Training Ticket
×4
Gems ×100
×2
Hero Fragment
×4
1 hr Speedup
×40
5K EXP Book
20,000 – 41,999personal points
4,800
Training Ticket
×8
Gems ×100
×4
Hero Fragment
×8
1 hr Speedup
×45
5K EXP Book
42,000 – 89,999personal points
7,200
Training Ticket
×12
Gems ×100
×6
Hero Fragment
×12
1 hr Speedup
×50
5K EXP Book
90,000 – 179,999personal points
9,600
Training Ticket
×16
Gems ×100
×8
Hero Fragment
×16
1 hr Speedup
×55
5K EXP Book
180,000+personal points
12,000
Training Ticket
×20
Gems ×100
×10
Hero Fragment
×20
1 hr Speedup
×60
5K EXP Book
Values read directly from the in-game Rules → Rewards screen. Solo rewards require at least 2,000 Personal Training Points, so even a quiet match is worth showing up for.
Minute By Minute
Battle Timeline
Pick a phase to see what each group should be doing.
Preparation
Battle begins, but the outer structures are still locked. Position, confirm assignments, and do not waste a teleport.
Command
Repeat Phase 1 assignments in chat and drop map markers on all six opening targets.
Strong Players
Move toward your assigned Power Control Station and sit on the approach.
Mid Players
Pair up on Emergency Stations — two Chiefs per station beats one hopeful Chief.
Support / Flex
Stage centrally so you can react in any direction the second things open.
Find Your Job
Battlefield Roles
Filter by your power level and how you like to play.
My Power
My Style
Strike Team
Strongest combat players. Break contested structures.
- Open contested buildings on command
- Move as a group, never solo
- Leave once the structure is held
Anchors
Defend high-value buildings.
- Sit on Power Stations and Nuclear
- Call for help early, not at 10% wall
- Never leave to chase
Flex Team
Teleport and redeploy wherever pressure appears.
- Hold a teleport in reserve
- Respond to markers within seconds
- Reinforce, stabilise, move on
Collectors
Prioritise Resupply Spots and Scattered Supplies.
- Pre-position before waves land
- Sweep dropped supplies after a structure falls
- Avoid main fights
Support Camp Team
Coordinate Support Squad attacks.
- Hold Support Camp
- Time squads ahead of player assaults
- Report weakened structures
Command
R5/R4 watching the whole map and directing rotations.
- Assign before battle, not during
- Mark targets
- Track the clock and the phase unlocks
Play Better
Strategy By Player Type
Same battlefield, three different jobs.
- Stay on your assigned objective
- Don't chase kills
- Respond to map pings
- Collect supplies you're standing next to
- Reinforce buildings under pressure
- Conserve teleports
- Heal and redeploy quickly
Teleport — Worth It
- Nuclear Plant unlock at 15:00
- Emergency defence of a scoring structure
- Reinforcing a contested Power Control Station
- Landing on a Resupply wave
- Saving a critical objective
Teleport — Wasted
- Moving slightly closer to something
- Chasing one enemy player
- Random repositioning
- Following kills across the map
Opening Split
Assign every Phase 1 building to named players before the battle starts. The land grab is decided in the sign-up channel, not at 3:00.
Power Station Economy
Two Power Control Stations held for the full hour can rival or beat a contested Nuclear Plant that changes hands every few minutes. Do the maths before you commit the map.
Nuclear Bait
The centre is designed to pull everyone in. Send a strike team, not an alliance. Enemies who over-commit hand you the outer map for free.
Map Pressure
Threaten several objectives at once. An enemy defending four places is defending none of them well.
Teleport Discipline
Always keep a handful of flex players with a teleport available. Mobility you already spent is not mobility.
Reactor Value
Halved capture time turns contested buildings over faster in your favour — its point value badly understates it.
Armory Timing
Combat buffs are worth the most when the whole strike team pushes together within the same window.
Support Camp Combo
Support Squad → strike team assault → capture → reinforce. In that order, every time.
Resupply Denial
Keep collectors separate from the strike force so supplies never wait for a fight to finish.
Overflow Recovery
When a long-held structure falls, immediately check the ground for Scattered Supplies before you re-contest it.
Avoid These
Common Mistakes
Kill Chasing
Winning personal fights while quietly losing buildings.
Nuclear Tunnel Vision
Sending everyone centre while outer structures vanish.
Teleport Spam
Burning mobility long before the moment that needed it.
No Assignments
Thirty Chiefs independently deciding where to go.
Empty Buildings
Capturing something and immediately abandoning it.
Ignoring Supplies
Leaving free score sitting on the battlefield.
No Flex Team
Everyone locked in place while another objective collapses.
Before The Whistle
Pre-Battle Checklist
Your progress is saved on this device.
Zarael & Awkie
Tips From The Field
Hard-won, mildly opinionated.
Don't chase a weak enemy across the map while they quietly take your Power Station. Congratulations — you won the fight and lost the war.
Your strongest player doesn't need to sit in one building for 60 minutes. Use heavy hitters as problem solvers.
First-capture bonuses make the opening sprint extremely valuable.
Free healing changes the normal risk calculation. Trade troops for TIME and MAP CONTROL.
If everyone goes Nuclear, nobody is defending your points engine.
A building generating points uncontested is doing more work than a player chasing personal kills.
Assign collectors before Resupply appears. "Everybody grab boxes!" is not a strategy.
One Page
The Winning Plan
- 1Be ready before the battle starts.
- 2At 3:00, immediately secure Phase 1 structures.
- 3Keep Power Stations scoring.
- 4Prepare your main rotation before 15:00.
- 5Contest Nuclear — don't blindly sacrifice the entire map for it.
- 6Use Armory, Reactor, Helicopter and Support Camp strategically.
- 7Collect Resupply and dropped supplies.
- 8Don't chase kills.
- 9Heal, redeploy and keep pressure on the map.
- 10At 60:00, the alliance with the most Training Points wins.
Battlefield Intel
Battlefield Building Intel
Know the buildings. Control the map. Win the points war.
Alliance Training isn't just about fighting. Every structure has a purpose. Some generate major points, some improve mobility, some strengthen your attacks, and others help your alliance control the battlefield faster. Tap a building to open its intel file.
Pick a structure above to open its intel file.
Chief, What Do We Need?
Chief, We Have A Problem...
One battlefield scenario at a time. Pick the structure that solves it.
Your alliance keeps winning fights, but the enemy returns before you can establish control. What building could help?
Commander Priority Board
ZA Game Guides Strategy — our recommendations, not official game rules
0:00 – 3:00
Prepare
Get assignments ready and position players for the opening. No teleports wasted.
3:00
Outer Buildings Open
First-capture bonuses pay once. Speed genuinely matters.
15:00
Center Fight
The centre opens. Send a named strike team — everyone else stays on their scoring structure.
Mid / Late Battle
Hold And Rotate
Watch Resupply Spots, defend existing scoring structures, and rotate players where enemy pressure develops.
Do not blindly abandon scoring buildings just to chase fights.